Edit your project
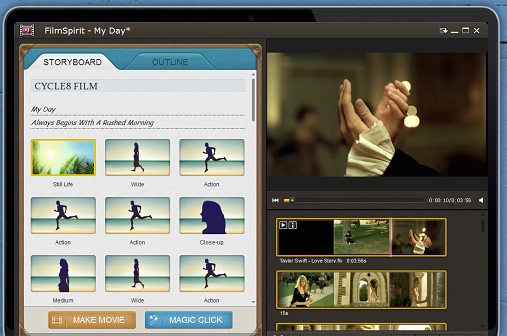
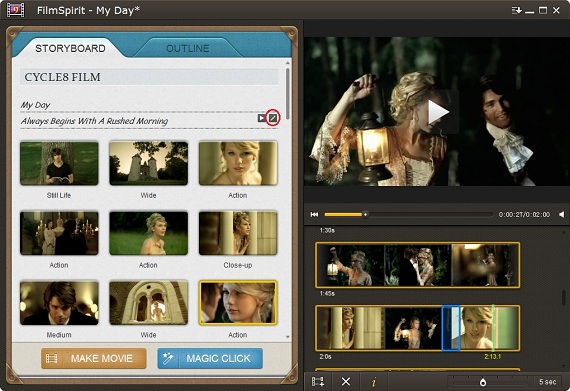
After you create or open a project, editing window will appear. You will be able to add and arrange clips in your project on this interface. You will find that all scenes of the selected mode appear in the left Storyboard. Under every scene, there will be several shots.
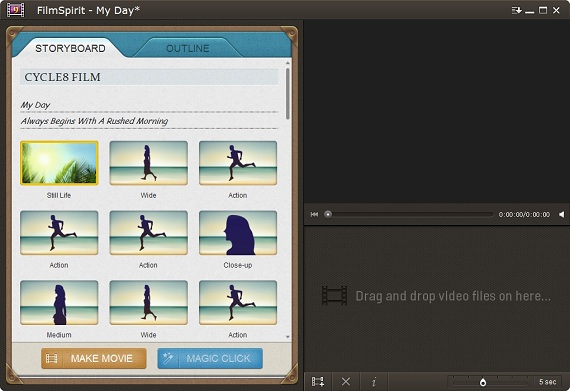
Add source video:
Do one of the following to add video:
- Click "Add" button at the bottom of the window to load all video clips into the event browser on the right side of the window.
- Drag video files directly to the event browser to add source video clips.
Set Time Scale:
"Time Scale" will help to show the video by different time interval such as 1sec, 2sec, 5sec, 20sec, 5min and all. The "Time Scale" is shorter, the video thumbnail will be more.
Play back media:
- It is easy to view your media by our software. Its previewing capabilities let you find what you need quickly. When new media is added, the software will optimize it. After all the video thumbnails are highlighted, you will be able to quickly skim your video to preview it, search for a particular shot. Move your mouse forward or backward over the media in event browser, the content plays in the preview window.
- A play button "
 " will appear when the mouse hovers above the shot in the storyboard. You can click it to preview shots or titles.
Set shots:
Choosing what you want to include in your final movie is a fundamental step in editing a video project. You can indicate what clips you want to act on by making a selection by FilmSpirit. Do one of the following to select clips:
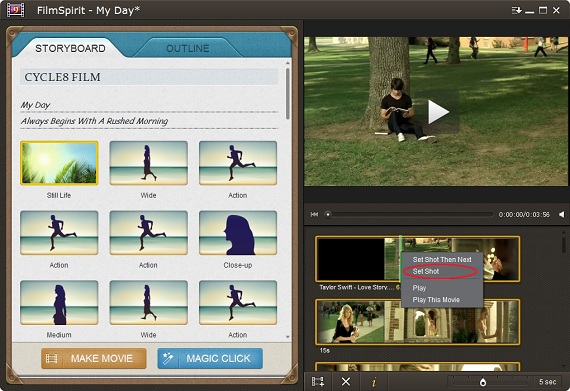
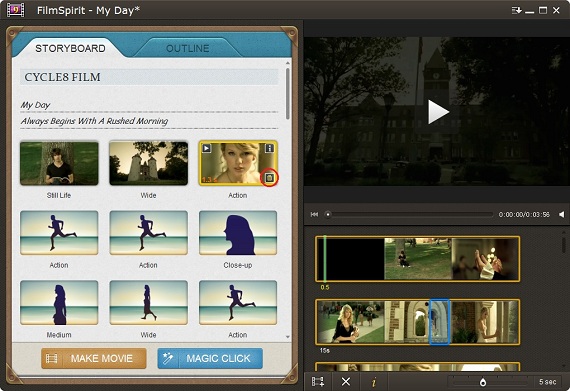
- Select the shot in the left storyboard, go back to the right event browser and move your mouse across video frames to decide which clip you want to set to be the shot. When you get it, right click the timeline and choose "Set shot" to set it. When the shot is set, its first frame will be shown in the corresponding location on the storyboard. You also can select "set shot then next" to set shot. After one shot is set, next shot will be highlighted in the storyboard.
- Decide which clip you want to add and double-click the start frame to add.
- One-click on "MAGIC CLICK" button will set shots with auto-selected video clips to all scenes.
Remove content from shot:
Do one of the following to remove content:
- Right click the shot in the storyboard and select "clear shot content" to remove the content. Then you can create new one for the shot.
- When the mouse hovers above the shot in the Storyboard, you will find "
 " button. You can click it to remove the content.
- Drag the existing shot from the Storyboard back to right event browser. The content will be removed.
Edit scene title:
- In the storyboard, move the mouse to the upper-right corner of the scene, and click "Edit" button. The title becomes editable. Type the words you want in the corresponding text box. You can also edit the producer on the top of the storyboard.
- Double-click the "title" to enter words.
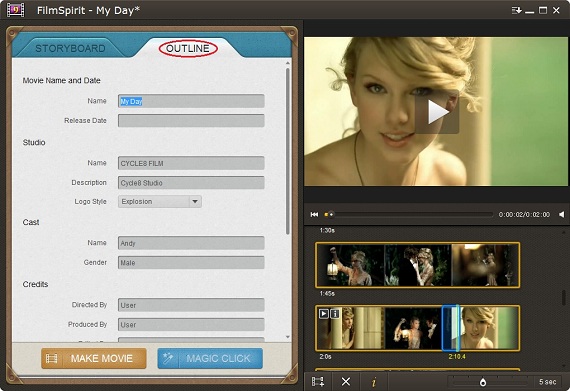
Edit outline:
Click "Outline" to switch storyboard to outline panel. And then edit all options to your preference, including movie name and date, studio, cast and credits.
Preview movie:
After all the above have been done, you can preview all shots of the movie before making it.To do it,
- Click any title or shot on the left storyboard to review it on the right preview window.
- Click "Play" button on any title or shot from the left "Storyboard" to preview the whole movie.
If you have any playing problem, maybe it is because that the OpenGL version (%1) on your machine doesn't support this application.
In this case, please try to upgrade your video card driver to the latest version, and then try the program again.
To do it, please follow one of the links below to go to the corresponding website directly and find out the suitable video card driver:
http://downloadcenter.intel.com/ for Intel graphic card users
http://support.amd.com/ for AMD graphic card users
http://www.nvidia.com/Download/index.aspx for NVIDIA graphic card users